Exercise #10: Pico-CPU (Design and test your Pico-Memory)
Important Note:
Please make sure you read Jiri Gaisler's "A structured VHDL design method". This
document would be used as our coding reference throughout the labs. Your designs would are not acceptable if you do not follow 2 process architectrue as a design rule.
Design your Pico-Memory
Our Pico-CPU memory system uses two separate registers, one as instruction
memory, and one as data memory. we will describe the memories in
behavioural VHDL. as we saw earlier, we have 16 bits instructions and 8 bit
data. this implies that we have to either implement the instruction memory
as 16 bit wide word or we can divide each instruction in two lines. If
the later is the case, then we need to perform two reads from instruction
memory for each fetch.
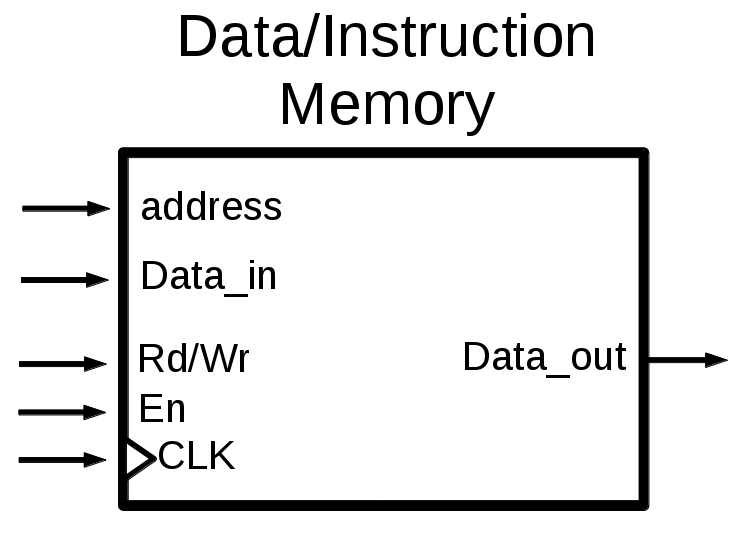
figure 1
Addressing Modes
Our Pico-CPU will only support immediate addressing meaning we will directly
use the memory address which we would like to use in our instruction.
This constraint has an impact on our memory size. If our address should fit
in one instruction, it means that our address is bounded in 8bits. In other
terms, we can at most address 256 memory spaces (0 to 255).
Testing Memory System
To test the Memory system we start reading data from a file into the memory
in the first phase, and then read it back from memory and write to a file. In
the end we have to check if these two files contain identical data. Our test
setup should look like figure 2.
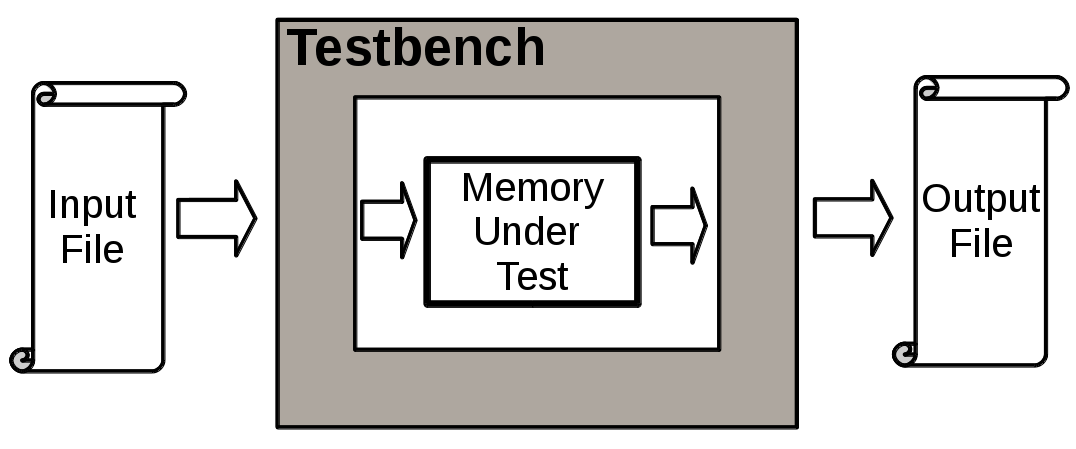
figure 2
Hints on VHDL file handeling
To read from a file in VHDL you have to first declare the input file and open
it with the following commands:
file InputFile : text;

file_open(InputFile, "Input_File.txt",
 read_mode);
to read from file, we can define a variable and read file line by line into
the variable:
variable LINEVARIABLE : line;

readline(InputFile, LINEVARIABLE);
To write into a file, the process is the same, you define and open a file in
write mode:
file OutputFile : text;

file_open(OutputFile, "Output_File.txt", write_mode);
And then you can write a line to the file:
writeline(OutputFile, LINEVARIABLE);
To make a line out of different signals you can use the write command as
follows:
write(LINEVARIABLE, Signal_1, Signal_2,..., Signal_N);